Showing posts with label shrinky dink tutorial. Show all posts

Friday, May 28, 2010

Shrink Plastic Adventures, Part 2


I am playing around with different ways to seal the ink on printable shrink plastic. My last attempt resulted in very "bleedy" ink and an undesirable effect overall, as seen in this blog post.

My next adventure in shrink plastic sealing begins with doing what I should have done in the first place: read and follow directions.


I took a handful of inkjet Shrinky Dinks and sprayed them with Krylon Crystal Clear Acrylic coating. This is how I did it:

1. I followed the directions on the can: shake for 2 minutes, hold about 12 inches away, spray with a quick sweep. It was probably hotter outside than the maximum recommended temperature, but I did store the Krylon inside.

2. Let it dry for 15 minutes.

Here are the results:


After one coat, it was very difficult to see any kind of sheen, much less a "gloss." So after 15 minutes, I resprayed...


After the second coat dried, a sheen was visible, although I would still not call it a "glossy" effect. In the photo below, there is a strange yellowness to the ink, and I think it may be an artifact of my camera or the fading light.


Inside under a fluorescent light, the sheen is more visible but you have to look closely to find it. There is also evidence of a "grit" that some folks at Craftster referred to that happens when you use glossy coat spray.


I sprayed a few of the pieces with a third coat of Krylon with no noticeable difference.

Next:
These pieces have 2 coats of Krylon and group 1 has an additional coat of a brush on gloss coating called "Triple Thick." Group 2 has a clear dimensional goo called "Glossy Accents" which I have used on paper with great success.


The results were close, but I have a slight preference for the charms with the Glossy Accents because it is REALLY glossy and there is a dimension to them that is not as noticeable with the brush on Triple Gloss.

More of the Glossy Accents charms:


The more "matte" look of the Triple Gloss charms:

Next I will try using UTEE, but for now, my conclusion: DEFINITELY seal the shrinky dinks with Krylon spray before applying a brush on or squeeze on gloss coat to avoid ink bleeding.

Shrink Plastic Adventures, Part 1

Shrink plastic, Shrinky Dinks. Whatever. They are super-cool.


I like to put charms on my notebooks, which is simple when you use a game board to make a notebook...just drill yo-self a hole in one of the game pieces and there's your charm.

For my laminated notebooks, I was using store bought silver colored charms when I could find good ones, but I really want handmade charms to put on my notebooks. The answer has to be Shrink Plastic.

I'm no stranger to Shrinky Dinks and have made lots of boo boos with them. Specifically, I have found that the inkjet ones are susceptible to loosing their ink.

I am trying to learn how best to seal the "shrinked" image to preserve the design AND to give it a glossy finish.

I read all over Craftster to get ideas. Craftster is great.


I tried some of the ideas, and probably due to my lack of attention to detail (ie, don't read directions), I got disappointing results.

Some folks say use a spray acrylic clear gloss. I didn't have that hanging around but I did have two of the items suggested on Craftster:

1) Triple Thick Gloss Coating by DecoArt
2) Glossy Accents by Ranger

Note: Other suggestions were UTEE and clear nail polish.

So post shrinking, I slathered on a really thick layer of each of these. Here's what it looked like immediately after applying the goo:


Next, I check back 4 hours later and...


Darn. Ink bleedage. Close up...


Neither product was really designed for the purpose of sealing ink onto shrink plastic, and the directions on the ink jet Shrinky Dinks specifically recommend Krylon Acrylic Coat spray.

Now I am going to try this again, with Krylon spray underneath and photos of results will follow....

Monday, September 1, 2008

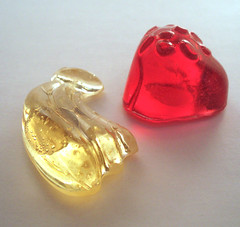
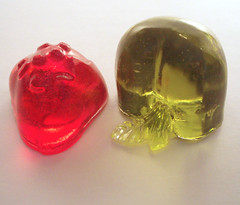
Fruit Magnets in the House.

Fruit magnets have finally made it to the shop. Essentially, there are two varieties: frosted and glossy. I'm going to tell you about them.


Frosted: The silicone molds I'm using naturally create a frosted finish. It really does look nice; light passing through is diffuse and casts a colorful glow-y shadow.

Glossy: Have a coat of high-gloss glaze on them. Once the glaze is applied and dries, the piece becomes incredibly glossy. It's almost petulant for (fake) fruit to behave so brazenly!

The ultra-powerful magnets are attached via "Goop" craft adhesive. It is a wonderful clear adhesive, but in the right circumstances (when 2 magnets meet at just the right angle and force), the magnets can overpower the adhesive and pop right off. So, I put a word of caution in the magnet listing about this VERY naughty behavior on the behalf of the neo magnets.

These are really fun to make, but from beginning-to-end, it is a laborious and time-intensive process:

1) Condition the molds
2)Warm the resin & catalyst
3)Pour/mix the resin, adding color if desired
4)Pour resin into molds
5) Babysit the molds as long as you can stand it (getting rid of bubbles, placing embeddments, etc.)
6) Wait a couple of hours and pour another layer (if adding embeddments)
7) Repeat # 6
8) Let resin cure overnight, in a covered container to prevent dust and wot-not from getting in
9) Pop pieces out (VERY hard on the hand joints), but extremely satisfying
10)Use dremmel to sand the backs until smooth (uses 2-3 different dremmel bits, goggles, dust mask, enormous mess)
11) If making a pendant, drill hole
12) Treat hole with sealant
13) Add gloss finish if that effect is desired
14) If piece is acceptable, attach findings for jewelry or magnets for, well, magnets
15)If piece is not acceptable, mix a new batch of clear resin and brush on the surface of piece
16) Check again for acceptability in 24 hours
17) Resand pieces if needed (or give the unsatisfactory ones away to unsuspecting family members)
18) Take photos
19) Make super-cute "upcycled" tin containers for presentation
20) List them in the shop!

It really is fun.

Wednesday, April 9, 2008

Shranky-DANKS!

So..I want to make sure that my designs are unique and that the packaging is just as enticing as the item itself - and handmade if possible. So after a lot of thinking, I've decided to make shrink plastic tags to attach to my sewn items like stuffies and zip pouches.
This weekend, I did a bit of experimenting (this is my first attempt at a sort of-tutorial) and here's what that looked like:

First, I used a round scalloped craft punch to cut out shapes. This part was kind of hard and mostly the punch wouldn't go all the way through the plastic. I tried sharpening the punch by punching through several sheets of aluminum foil and that did the trick. Then I drew doodle-y designs on them and colored in with sharpies.
Close up of doodle-y designs shows that I had fun putting dots around the edge. The quarter gives you an idea of the size. My first mistake was not punching the hole in the tag before drawing the designs. And, as you will see below, I wasn't sure where the hole would land and I goofed one up.

This is the first batch and you can see that they have potential, but the one with a colored border just looks gnarly. It only took 1 minute in my oven (the directions say 1-3 minutes). The pig in the above picture had a 1/8" hole punch that shrunk down to practically a pinhole! These would be good for earrings, but not for what I am trying to do. So I decided to do a new batch with a few modifications.

These guys came out sooo much better (Note the one with a heart border!!!). Even a regular sized hole punch (which is what you see above) won't work for my purposes...I'll have to find myself a big ole hole punch so I can thread ball-chains though the hole to attach to my goodies. The colors are really vibrant and it seems that having a black outline of your drawing is key to getting the design to stand out.

This image gives you an idea of the joocee thickness of the plastic after it shrinks. It is a very satisfying thickness, I must say. Next weekend, I will try using the inkjet shrink plastic to print out some of my designs for shrinkage.