Showing posts with label handmade. Show all posts

Monday, May 24, 2010

Renegade Craft Fair


It was my first big show, and TONS of fun. If you live in a town that hosts a Renegade Craft Fair, GO because you won't be disappointed.

I took a few photos with my camera so I could have a few memories to take with me. Here is my booth...


You can find the list of Austin vendors at the show at the Renegade Craft Fair website. I did a little shopping and over the next week plan to share photos and shopping info on some of the yummy goodies I brought home with me.

Sunday, December 6, 2009

My One Hundred and Eleventyith Sale!

I've always wanted a reason to say "hundred and eleventyith." And now I have one! Today my etsy sales number reached 111.

In celebration, a prize must be awarded.

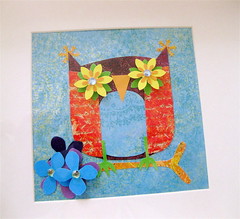
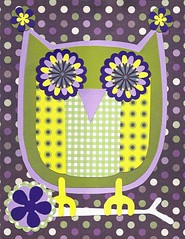
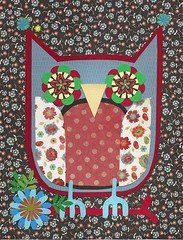
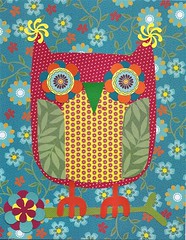
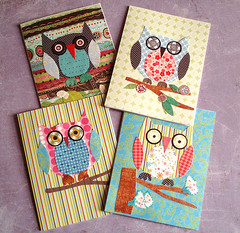
Up for grabs is one of the 4 hand cut owl collages seen below. Each is 8 inches x 10 inches with about 1/4" of dimensionality.


How to enter:

1) Choose your favorite of the 4 and comment on this post telling me which one is your favorite.
2) Share a link to a favorite crafty blog of yours and you will be entered to win your favorite owl!
3) If you get a friend to enter, your name will go into the "bag" for each friend you refer. Make sure your friend says that you sent them my way so's you can get credit for the referral.

4) HERE's THE HITCH/FINE PRINT/CATCH: In order for this contest to be "ON," there must be a minimum of 11 unique/different entries. In other words, a minimum of 11 different people need to enter the contest by the deadline in order for this contest to be ON. So get going, people!!

On January 1, 2010, I will select the winner. The winning entry will receive the owl collage she chose as her favorite. Yahoo!

Friday, November 6, 2009

A Fabulous Shop Update, If I May Say So!

Oh, there are goodies in the shop and a fresh new batch that I am super excited about!


-New Eye Candy Binder/Organizers in ROCKIN Sassafras Lass papers
-Mail-a-Books in crazy beautiful Que Sera Sera patterned papers
-A new item I have introduced called "Pound O Paper"

In the next shop update, there will be awesome new laminated luggage tags from our favorite papers, awesome 3d bird stickers, glittered Christmas cards, and butterfly collages. WHOA.

Plus, a new set of freakin' awesome vintage game board journals. So STAY TUNED!!!

Friday, October 30, 2009

Christmas Owls for Postcards

Hello friends and owl-lovers,
This year, I plan to make Christmas cards using 4 owl collage images. My plan is to make postcards and sell them in packages of 4 or more. Postcards in bulk are relatively inexpensive, and therefore I can pass the savings on to you! If interest is high, I will consider doing 6 images rather than 4.

Below is image number one. My plan is to do 2 with red and green as the predominant colors, one with blue and white with some green, and one multicolor (that is the one below).

If you think you might be interested in purchasing sets of these postcards as your holiday/new year's cards, leave me a comment with the number of cards you would consider purchasing. This will give me an idea of how many to have printed. The more cards that are printed, the cheaper they are! And the better bargain YOU will get, so if you like these images, tell your friends!

More owl collage images for you...


Wednesday, July 22, 2009

Tutorial: How to Make a Sink Skirt


If you have an old bathroom like me, you probably have a sink with exposed pipes. Yuck! Plus, you don't have the benefit of under-sink storage. So an easy option to cover up the uglies is to make a sink "skirt." Here's how to do it...

Before:

Obtain some velcro-type fastener stuff. I used Velcro brand "Home Decor" tape. One side is a peel-off adhesive and the other side is made for you to stitch.

So stick the adhesive side around the edge of your sink like this:


Measure the distance around your sink and from sink to floor. Add about 1/2" to measurements on each side for a seam allowance. If you want to add pleats or a gathered look, add extra width to account for this. Cut your fabric to these dimensions as well as your trim if you want to add it.

Note: I did not accurately measure the length from sink to floor, so my skirt came out too long. I was lazy and just took up the excess in a "fold" and restitched. You will see this in a later photo.

Press a 1/2" seam allowance around all edges of the fabric. If you want a pleat along the top edge, press the pleat and pin to secure it.


Next, pin the velcro along the top edge of the skirt.


Pin the trim along the bottom edge of the skirt. Stitch all the way around the 4 sides of the skirt, through the velcro and through the trim. I used a 1/4" seam allowance.

Stitch a second row along the velcro edge in order to secure both sides of the velcro to the fabric.


This is what the top should look like if you included an inverted pleat.


Because my skirt was too long, I "hitched" it up a couple of inches.


Then I did the responsible thing and actually checked to be sure my new length was correct.


I secured the new length with two rows of stitches. In the picture below, you can see that the edges did not line up evenly. Oh well!


Nevertheless, it is an improvement over the naked sink and now I can hide some unsightly stuff behind the skirt!


Now, would a matching toilet skirt be going overboard???

Friday, December 26, 2008

A Free Gift for You!

I am developing a series of download-able stationery sets. Hooray! Currently, the theme is owls but I have a ton of ideas for other themes.

The download set will include 4 different designs of cards and stationery sheets, a sheet of stickers, and an envelope design. Once these designs are downloaded, you can print them out to use or to give as a gift set.

The actual downloads will be in the form of high-quality pdf files. Below they are jpeg files since Blogger won't let me upload pdfs for some reason. Still working on that kink.

Right now, here is what is available for download in the shop: stationery, doodles, and color-your-own goodies, which are blackline drawings that require no color ink and are begging to be painted or colored with crayons, glitter, pastels - endless possibilities!

Here are a few of the "Rainbow" printables for you, my precious reader. If you do download and print them, I would love to know if you find that the colors are true, margins are appropriate, etc. I'll be testing them myself once I'm reunited with my printer.

Here they are:


Monday, December 1, 2008

Holiday Cards Set 1 are Ready!


This card design is simple: 2 hand-carved stamps and 2 colors of pigment ink. The message inside says, "Peace on Earth." If you want to see more pictures, they are in the Blue Cake and Buttercup shop.

Wednesday, November 26, 2008

Cupcake Zipper Pouches and More


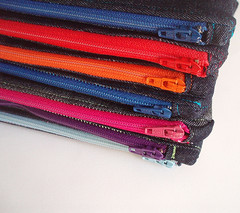
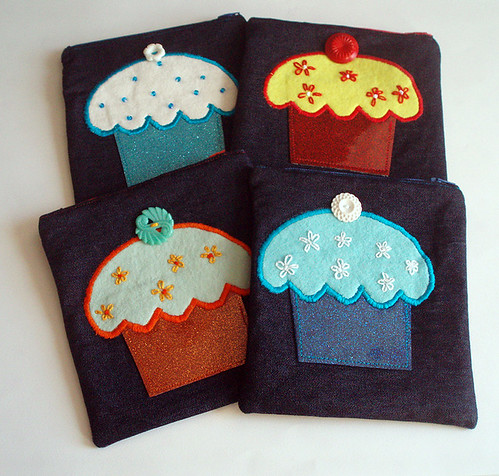
Hooray for a shop update! Visit the crabappledesign shop to see the growing selection of handmade zipper pouches. Here's a peek:


As I mentioned in an earlier post, I have opened a new shop called Blue Cake and Buttercup. This shop is an extension of Crab Apple Designs. These owl cards are just an example of the ongoing updates of yummy paper goodies in the new shop.

Please take a moment to visit BlueCakeAndButtercup and let me know what you think!

xo melissa

Monday, November 17, 2008

More Crafty Goodness

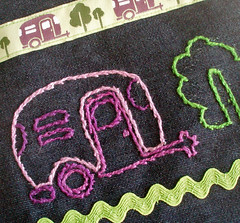
Elsie*Cake's Online Class is so great. It has inspired me to try and re-try all kinds of crafts. Here are some of the results: